Showing posts with label Ent. Center. Show all posts

Wednesday, June 3, 2009

Project DONE!

Here it is, completed, with the doors closed. I had it in the back of my mind that there might have been a way that the remotes would have worked due to the fact I had a bigger gap in the drawer fronts than I wanted, but no such luck. The doors will have to be open. As you can see, the sapwood is all but gone on the drawer fronts. The camera also does a poor job of showing how alive the rays are on the front drawer.
Front view with the doors closed.


This is a side and front view showing the ventilation that the components will get. The back is all open, as are the sides, so I'm not really worried about anything overheating. In fact, the front will be open as well whenever it would even think about getting hot.
There are a couple of "better to be lucky than be good" things I should point out. When the drawer fronts are open, the dvd player tray misses the drawer opening by about 1/4". A little too close for me, but not much I can do about that. I also knew that I was going to be tight across the front with the dish, center channel speaker, and stereo. I didn't have much room to spare, maybe an inch or two.Front view.


Side view.


Here is a picture of the entertainment center all waxed up and loaded up.
Doors open for component access.


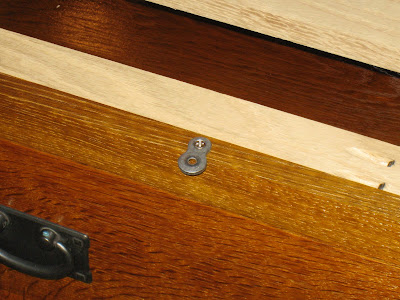
All that's left to do now is install the top, take some pictures, and watch a movie. I'm using figure 8 clips ton install the top. Predrill and install the clips on the cabinet side, position the piece where it needs to be on the top, mark the location, and drill into the top with a forstner bit. Then predrill and install to the top. the clips will show, but only if you are looking directly under it.
Figure 8 clips being installed.

Tuesday, June 2, 2009

I love the smell of Shellac in the morning.

My wax arrived in the mail today, so I spent my lunch hour waxing the piece, and I also installed the tracks, and installed hardware. Tonight I will attach the top and put it to work.
Piece waxed, and hardware installed.


With the piece ready for final assembly, I took some playing cards and shimmed in the track that the drawers ride on. There was a little racking of the drawers during construction.
Adjusting the track.


After I got about 3 coats on, I used 320 grit sandpaper and sanded the piece back to get rid of any dust nibs, and to smooth the piece out.
Piece during sanding.


After I let the piece "gas out" for a few hours, I started to apply the shellac. I thinned it with lacquer thinner. Funny story here. It's been a while since I've used shellac, and the last time i thinned it down as well. I had two gallon steel cans in my possession, lacquer thinner, and mineral spirits. I knew that it wasn't mineral spirits, so I grabbed the lacquer thinner. It went on nicely, and between that and the fact it was a warm day, it dried very quickly. It wasn't until I got about 3 coats on that I started to wonder if I was using the right stuff. I wasn't. I was supposed to use denatured alcohol. However, the finish was dry, so I didn't worry about it. My final coats will be shellac thinned with alcohol.
Top after shellac.


I didn't get a shot of the top after fuming, but here it is. You can see a small streak of sapwood in the middle of the board. That was my comprimise between as big of a top as I could get, and grain matching.
Top after fuming.

Tuesday, May 26, 2009

Bombs Away!!!

11:45 minutes later, and this is the result. It fumed up nicely, and the shop smells like a kitty litter box thats about 3 months overdue for a change. Thankfully, there is a nice wind today and it gassed out nicely. You can see on the drawer front, a hint of sapwood. Ideally, I would liked to have taken it out, but my board was a little short already, and I think all it will do is just add character to the piece. By the time I get done with the shellac, It might not even be noticeable.

11:45 ended up being about the right time. I took a sample piece out and put a couple of coats of shellac on it, and took it into the Mrs. for a vote. It looked good to her, so it looked good to me.
11:45 later.


As you can tell by the picture, (the door is open) it's dark out, and the fuming has begun. Before I sealed it up, I threw some scrap in there. I'll open it up 12 hours later and see how dark it is. My concern is that when I did my test pieces, I had the same surface area of ammonia, but a smaller volume. I'm keeping the same surface area, but my volume is bigger.
Fuming Started. Hope you can hold your breathe.


I didn't want any tan lines from the fuming, so I put the table on points so the bottom would get fumed, and for the top, I made some additional stand-offs to let the fumes get to the bottom of the table top. After I took this picture, I also opened up the drawer fronts.
Another shot before fuming.


Duct tape is used here to seal all of the joints. I made a top, bottom, left, and right frame. The front and back pieces of plastic are just going to be taped to the other frames. For those, I taped the sides and top, and pushed the bottom under with a putty knife.
Table loaded into the tent.


After the frames were constructed, I took some plastic and stretched it over the frame. I used 1/4" staples.
Frame completed.


So, back to the project. I'm also in the process of cleaning out the garage, so I decided to rip up a sheet of plywood that I've had laying around for some time to build the frame. Pocket screws will hold it together. I'm not bothering with glue...screws should hold enough for what I need it to do.
Fuming Tent Construction.


It's been a while since I've done anything with this project. Things have been getting in the way like selling our house, family events, etc, etc. The biggest thing was finding enough time. (and the right amount of time) Memorial Day weekend was the time. My biggest concern about fuming wasn't finding time, but the ability to have the fuming be done at a time where there was still ample daylight so if it needed to fume longer, that I could put it back into the tent, fume longer, and pull it back out with daylight left. The last thing I wanted to do was to check color without the right light.

Wednesday, May 6, 2009

Fuming Part 1 + Odds & Ends

I was going to let this one slide, but I had the opportunity to judge a cabinetmaking class at my alma motter, and for as hard as I was on them, and for as hard as I've been on myself, I couldn't let this one slide. After the glueup of the shelf, I glued it in place before I sanded it, and I didn't get the boards flat. I was going to let it go because the top board was taller than the front, and it was on a lower shelf where nobody was ever going to see it. I took a sharp chisel, and 5 minutes of work, and now it's flat.

I can handle somebody critiquing my work from a design perspective, because that's subjective, but when it comes to construction, there are no excuses.
Fixing a mistake.


After 23 hours, this what I got. The piece on the left is what I started with, the piece on the right is what happened. Pretty cool, but a little dark.
Fuming complete.


Centered and level...can't ask for much else.
Hinge installed.


While the ammonia is doing its thing, I'll install the hardware for the drawers. About the biggest thing to remember with these pulls is that the holes aren't in the center of the pull.
Hardware I'm using.


I cut up a couple of pieces for fuming and put them into a tote. I'm a little concerned about "tan lines", in this case the fumes not being able to get to the underside of the pieces. It shouldn't be a problem with the full size piece because I'll be able to stand everything off. The procedure is about as easy as it gets. Ammonia in a container to increase surface area, put into a sealed container, wait.
Test pieces ready to go.


It's as good a time as any to start fuming. I've only read about it, and I've been sitting on the last couple of jugs that my work has for just such a project. My company used to have an old blue line machine that used ammonium hydroxide to develop the paper. We have since upgraded to a large format copier, so as common as this stuff used to be in my daily life, it's pretty rare now.
Ammonia.


With the drawers complete, there are just a few odds and ends to finish up. The biggest is the top. I ripped it to final width, and in the picture below, I'm trimming it to final length. I tried cutting it at the tablesaw, but it was just too big for the cross cut sled. A straightedge and a straight cutting bit worked nicely.
Trimming the top to final width.

Thursday, April 30, 2009

Drawers Fit

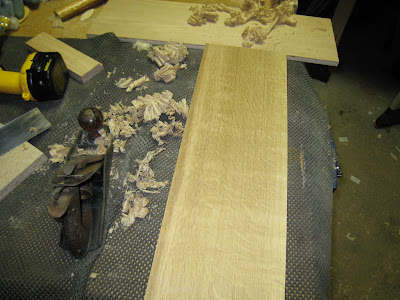
Here is a shot of the shavings I was making while fitting the drawers. The No. 4 did a really good job of this, but my only complaint with it is that the handle is a little small, and didn't really fit my hand well. My No. 5 fits my hand better, but I like the control that the No. 4 gives me.
I think I have a drill under there somewhere...


The problem with perfect fitting front faces is that I had to take quite a bit of material off to get it that way. When the drawers are in the open position, you can see what I'm talking about. I showed it to my wife and she didn't notice it until I told her. It didn't bother her, and I don't think that it will bother me. Maybe.
Drawer thickness is off.


Here is a shot showing the drawers in there open position.
Drawers open.


After about 45 minutes of planing and checking, here is the result. False drawer fronts that are flush with the front.
Drawers fitting nicely.


Lots of work, but I'm sneaking up on the fit that I want.
Drawer installed showing me how far I need to go.


With the dowels fit, it was now time to work on the drawer fronts. When I bought the boards, they were S3S. (surfaced 3 sides) The problem with this is that the grain on this board was pretty wild, and there was a lot of chipout, because the board was run in the wrong direction. It's like petting a cat in the wrong direction. So I took some time and sharpened up this plane, and used it to smooth out the board.
Starting to plane down the drawer front with my "new" No. 4 Stanley.


I drilled a 3/8" hole in the legs, and installed the dowels. The closer I'm getting to the end, the more nervous I'm getting because the margin for error is getting greater and greater. Well, the dowels were a little large, so it was back to the lathe. By the time they fit correctly, there wasn't much of a shoulder left.
Dowel serving as a drawer support.


A couple of cuts at the bandsaw, and the dowels are complete.
Dowels complete.


With the drawers installed, it was time to turn my attention to the dowels that will hold the drawers up. I squared up a piece of QSWO and put in on my lathe. After it was round, I took a parting tool, and a couple of open ended wrenches and made a 1/2" dowel, with a 3/8" tenon. If the drawers don't fit, I'll chuck the dowel in the lathe and turn it down until it fits.
Turning the dowels.

Tuesday, April 28, 2009

Glue Ups and Drawers and Hinges oh my!

After some fuss, I finally got the look that I was going after.
Shot of where I am.


The dust frame I knocked out of some red oak, and I just used pocket screws to tie everything together. I didn't glue anything together, because I want the freedom to work on it in the future if I need to.
My original design was to have the two drawers be independent of each other, but after some "thought experiments" aka daydreaming, I concluded that if one drawer was going to be open, more than likely the other one would be open too. Hence, the design changed to one sliding drawer that accepts two drawer fronts.
Another shot of the drawer back.


After thinking about it for a few hours, a mock up or two, and talking to some friends about what to do, this is what I came up with. I made a dust frame that sits in the groove and will slide back and forth. To lift the drawer, I'm using some European hinges from some cabinets that never got their doors. The hinges aren't strong enough to hold the drawer up by themselves, so I'll have to add a dowel to the side to help with that. I'll also need to put a stop of some kind on the bottom because these hinges close past 90 degrees.
The beauty of these hinges is that you can dial in the doors, or in my case drawers, in all three directions.
My solution.


With a 1/4" stacked dado, I cut the dado in the boards. It took three passes.
Slides completed.


I knew that I was going to need something for the drawers to slide in, but I still wasn't sure how it was going to work. What I had designed was just too complicated, and didn't offer any adjustment whatsoever.
Stock for the slide.


I need to cut a notch in the corners of the shelf to fit around the legs. I went old school on this. I used my dovetail saw to cut the wood against the grain, and a chisel on the other side and chop the piece out.
Layout of the notch.


Now comes the beginning part that is going to slow me down. I not sure how to attach the shelf. I know that I don't want to cut into the sides, and the panel being solid wood will need to float. the solution was a cleat that will be screwed into the sides, and the rails. I don't think that there will be a need for glue here. This picture just shows the rail being held in place with carpet tape.
Shelf support.


Same drill as with other panels. Joint one edge, rip opposite end, joint ripped edge, biscuit, glue.
Board glued up, scraped, and sanded smooth.


With the piece now completely assembled, it's time to turn our attention to the shelf that the electronics will sit on. This is the board for that shelf. 4/4 flat sawn white oak. Lots of sapwood, but you will never see it.
Board for the shelf.


With the ends glued up and dried, it's time to glue up the lower shelf and rails. In a true example of playing checkers instead of chess, (or a poor game of chess) I didn't sand the bottom shelf or rails because I knew that I would have a joint to sand at the center stile, so I didn't. It's not that big of a deal, just a little more work in the future.
Glue Up

Thursday, April 23, 2009

Glue Up!

To help prevent chipout from moving this piece around, I chamfered the bottom of the legs.
Closeup of the chamfer.


I didn't get a picture of the full mortise from the lower shelf, so here that is.
Picture of the full mortise.


With the lower shelf complete, I decided it was time sanding the piece, and I cut the chamfers in the legs. Glue on the tenon, and in the mortise, assemble, and clamp. All of the spindles are floating. After I got the piece in the clamps, I wiped off any glue squeeze out with a damp paper towel. After it's cured, and the piece is dry, I'll sand back any remaining glue.
First end panel in the clamps.

Bottom shelf work

Well, after cutting the shoulders, I got to thinking, how do i go about cutting the notch in the shelf to make the two tenons? My solution was to not worry about it, and I took the rails back to the mortise machine and made one continuous mortise. I made the tenon oversize, and now is the time to trim to fit. It's really slow going, given my compliment of tools, but after a couple of hours, I had them fitting pretty darn good.

OOPS!

Can you see my mistake? Check the top spindle mortise. It's larger than the others. I think it was a result of not being tight up to the fence when I cut it. Thankfully, it was still small enough that the spindle covered it, but I did have to glue some material to the tenon, and then trim it back to fit. After assembly, you'll never be able to identify it.
Dry fit.


To transfer to the other rail, it's just a simple matter of extending lines, and ticking them over to the other piece. I only need to worry about the ends, because the depth will be set by the mortise machine fence.
Transferring to other rail.

Layout for the mortise is like before. I put some X's in this one because I am planning on doing two mortises, and I don't want to chop farther than I need to.
Layout for mortise.


With just what you see below, I clamped up the table so I could get a measurement for the lower shelf. I have already glued that together using the same techniques that I used for the table top. I was really scratching my head on how to attach this, and my "Mission furniture, and how to make it" book in the end gave me my answer. My concerns were racking forces, and if a mortise and tenon was going to be strong enough. I thought about using cleats to help, but I couldn't find examples of that in the book, so I decided to keep it traditional.
Clamp-up for measurements.


With the spindles done, I thought it would be a good time to cut the arches in the bottom rails. I laid it out using a flexible ruler, cut it at the bandsaw, and smoothed it with a drum sander mounted in the drill press. Here is the result.
Arch cut into the rail.