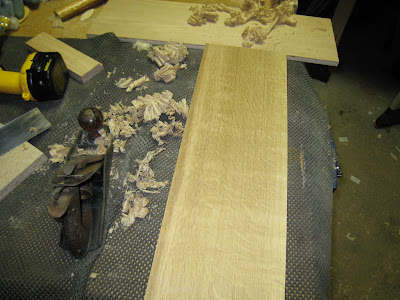
Here is a shot of the shavings I was making while fitting the drawers. The No. 4 did a really good job of this, but my only complaint with it is that the handle is a little small, and didn't really fit my hand well. My No. 5 fits my hand better, but I like the control that the No. 4 gives me.
 I think I have a drill under there somewhere...
The problem with perfect fitting front faces is that I had to take quite a bit of material off to get it that way. When the drawers are in the open position, you can see what I'm talking about. I showed it to my wife and she didn't notice it until I told her. It didn't bother her, and I don't think that it will bother me. Maybe.
 Drawers open.
After about 45 minutes of planing and checking, here is the result. False drawer fronts that are flush with the front.
 Drawer installed showing me how far I need to go.
With the dowels fit, it was now time to work on the drawer fronts. When I bought the boards, they were S3S. (surfaced 3 sides) The problem with this is that the grain on this board was pretty wild, and there was a lot of chipout, because the board was run in the wrong direction. It's like petting a cat in the wrong direction. So I took some time and sharpened up this plane, and used it to smooth out the board.
 Starting to plane down the drawer front with my "new" No. 4 Stanley.
I drilled a 3/8" hole in the legs, and installed the dowels. The closer I'm getting to the end, the more nervous I'm getting because the margin for error is getting greater and greater. Well, the dowels were a little large, so it was back to the lathe. By the time they fit correctly, there wasn't much of a shoulder left.
 Dowels complete.
With the drawers installed, it was time to turn my attention to the dowels that will hold the drawers up. I squared up a piece of QSWO and put in on my lathe. After it was round, I took a parting tool, and a couple of open ended wrenches and made a 1/2" dowel, with a 3/8" tenon. If the drawers don't fit, I'll chuck the dowel in the lathe and turn it down until it fits.


No comments:
Post a Comment